
Building My Own Zeroboy: A Game Boy Reborn by Hand

Updated: 5 days ago
There is a particular kind of itch that every Game Boy lover knows: the wish for one machine that keeps the soul of the original but can do so much more. I did not want to buy that machine. I wanted to build it with my own hands. So I built a Zeroboy.
This one is personal. It is the only item in the entire collection that I made myself, and it might be the piece I am proudest of.

The Game Boy Zero Dream
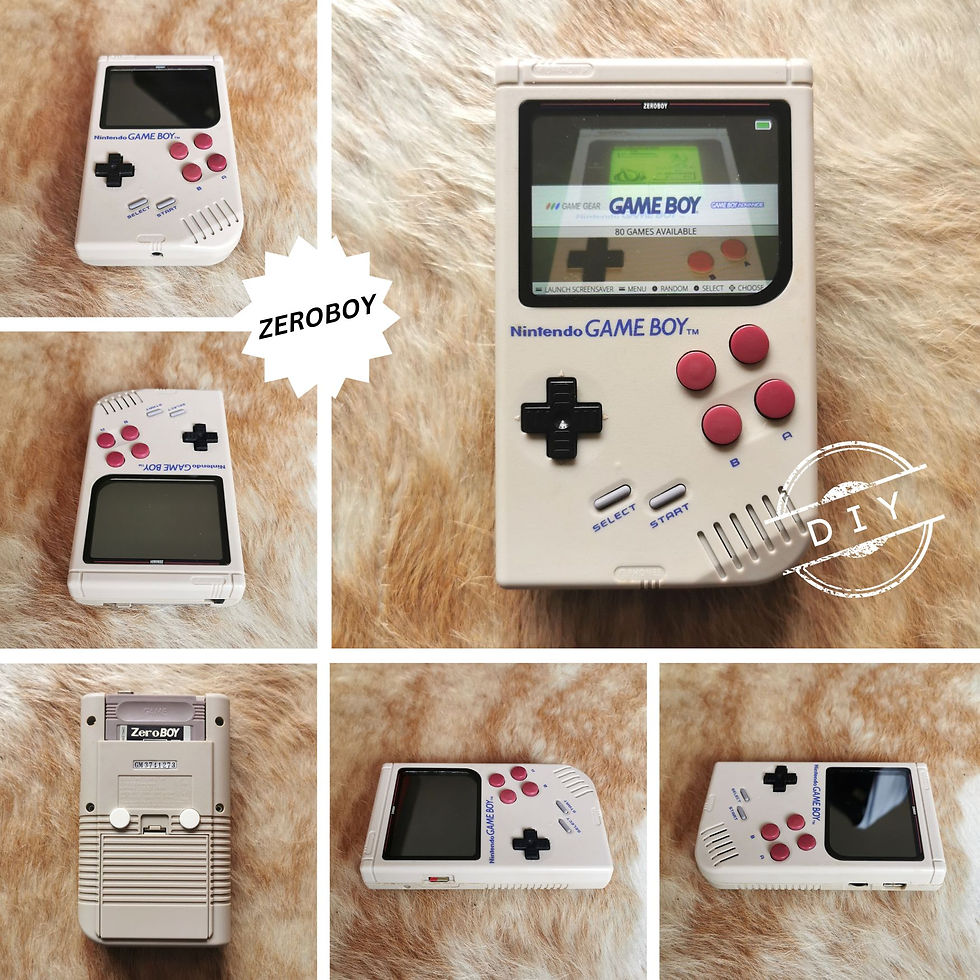
A Zeroboy belongs to the wider Game Boy Zero movement: the idea of fitting a tiny modern computer, usually a Raspberry Pi, inside a genuine DMG-01 shell. From the outside it still looks like the classic grey brick I grew up with. Inside, it runs a sharp colour display, a high-capacity battery and an emulator that can play a huge library of retro games. There is no official product and no neat kit you simply click together. Every Game Boy Zero is hand-built, so no two are ever quite the same.
Sourcing the Parts from Around the World
Half the adventure was gathering the pieces. There was no box to buy, so I ordered the components myself from suppliers abroad: the Raspberry Pi, the screen, the battery, the buttons and the small boards that tie everything together. Parts trickled in from different corners of the world over several weeks, and slowly a pile of electronics on my desk started to look like it might one day become a Game Boy again.
More Controls Than Nintendo Ever Intended
The original Game Boy gave you two action buttons, A and B, and that was plenty for its library. Mine needed more. On the front I added two extra red buttons alongside the classic pair, so the familiar face now carries four. On the back I fitted two more, shoulder-style triggers that the original shell was never designed for. These extra controls are not decoration. They are exactly what lets this little grey case handle modern and more demanding games that a simple two-button layout could never cope with. Drilling cleanly into a genuine DMG-01 shell, placing the buttons so they feel natural under the fingers and wiring each one back to the board took patience and more than a few test fits before everything sat right.
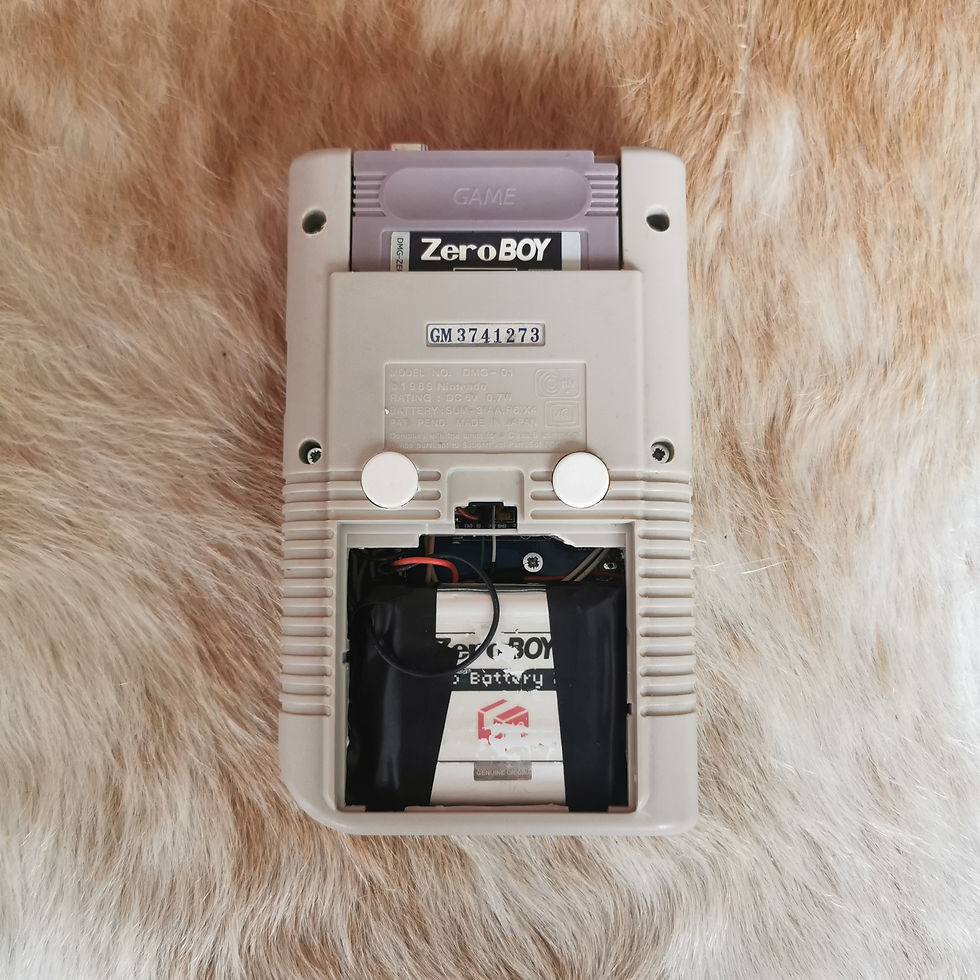
Inside Game Boy Zero Inside Game Boy Zero Battery Pack
Soldering My Own HDMI Cable
The hardest part, and the one I am secretly proudest of, was the video connection. Instead of relying on a ready-made lead, I soldered the HDMI cable myself, joining it together strand by strand from individual wires. If you have ever tried this, you know how unforgiving it is: the wires are hair-thin, the contacts are tiny, and a single bad joint means no picture at all. When the display finally lit up cleanly, after more than one false start, it was one of the most satisfying moments I have had in this whole hobby.
A Highly Customised RetroPie Heart
Hardware is only half of a Zeroboy. The brain of mine is a Raspberry Pi running RetroPie, and I refused to settle for the default install. I built a highly customised setup, reworking the menus, the button mapping for those six controls, the emulators and even the boot sequence so the finished machine feels like a Game Boy rather than a small computer wearing a costume. Getting emulation to run smoothly, with the right systems, the right performance and a front end that feels native in the hand, is fiddly and largely invisible work. Nobody sees the hours of tweaking config files and testing games one by one, but it is the difference between a gadget and something that genuinely feels like a console.
A Labour of Love
Why go to all this trouble when you can emulate a Game Boy on a phone in seconds? Because this was never about convenience. All told, the build cost me well over a hundred hours, spread across sourcing parts, drilling and fitting buttons, soldering, wiring, flashing software and endless small adjustments. It was about keeping my hands on the thing I love, understanding it down to the last wire, and giving a classic shell a second life without losing what made it special in the first place. My Zeroboy is not flawless, and that is exactly why I treasure it. It carries my own soldering, my own mistakes and my own fixes.
It sits in the collection among the other DIY and modding pieces, like the GBinterceptor, as proof that the Game Boy is not only something to keep behind glass. It is still something to build, tinker with and genuinely love. You can see my Zeroboy in the collection.


Comments