
Game Boy Hardware Explained, Part 1: The Shell, Buttons and Controls

Updated: 17 hours ago
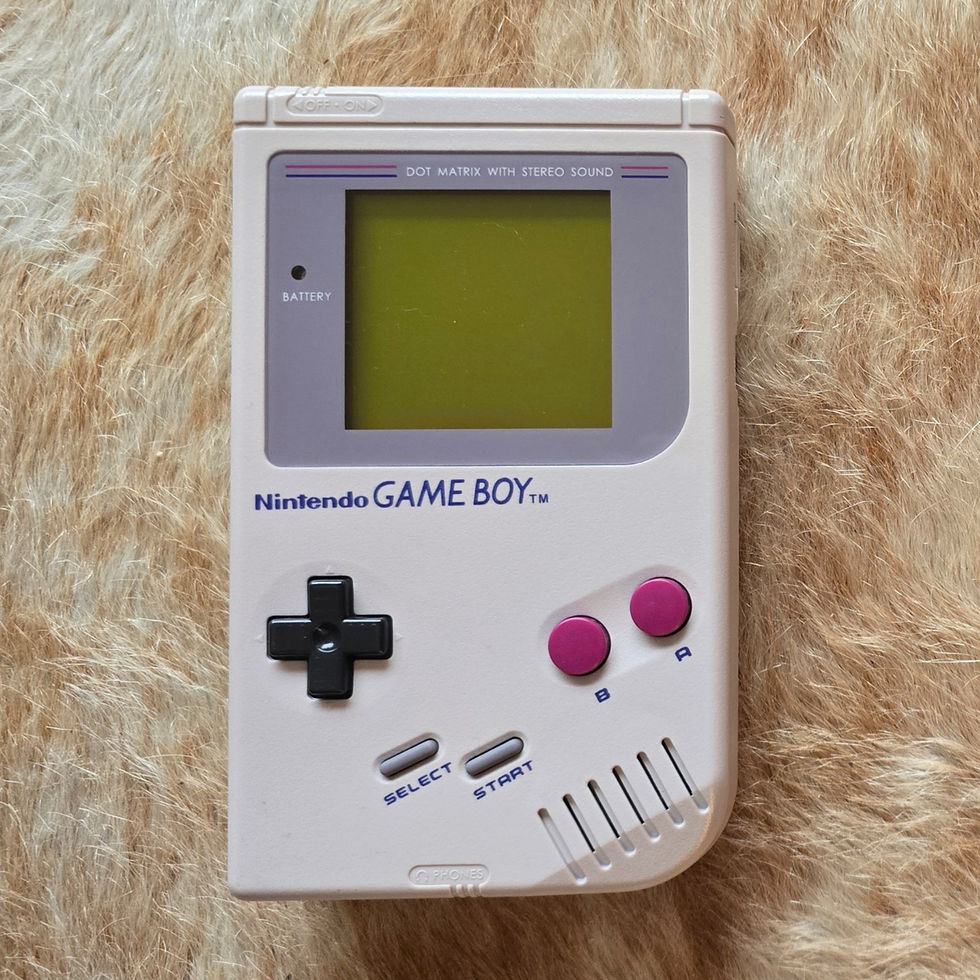
Before any chip or circuit does its work, the Game Boy is a thing you hold. Pick up a DMG-01 today and the first impression is physical: a chunky, matte, grey-white slab that feels as if it could survive being dropped down a flight of stairs. That feeling is not an accident. This first part of the series stays entirely on the outside, with the plastic shell, the buttons and the controls, the parts your hands actually meet, and explains why Nintendo built each of them exactly the way it did.
Two shells and six screws
The body of the Game Boy is made from two moulded halves of ABS plastic, a tough, lightweight thermoplastic chosen because it shrugs off knocks and flexes rather than shatters. The front shell carries the window for the screen, the holes for the buttons and the moulded slots of the speaker grille. The back shell holds the battery compartment, the ports and most of the internal mounting posts. The two halves clamp together over the electronics and are held by six small screws, four around the edges and two more tucked inside the battery compartment.
That screw choice is a small piece of Nintendo history in itself. The six screws that hold the outer case shut are not ordinary screws at all: they are Nintendo's proprietary tri-wing screws, with a three-bladed slot that an everyday flat or cross-head screwdriver cannot grip. Nintendo used these security screws across its machines to discourage people from prising them open, and you need a special tri-wing bit to take a Game Boy's shell apart.
The screws inside, the ones holding the circuit boards in place, are by contrast perfectly ordinary Phillips cross-head screws. None of this makes the console hard to service today, since tri-wing bits are cheap and live in every console-repair kit, but it is the reason you cannot open a DMG-01 with the screwdriver in your kitchen drawer. On the back and right edge you also find two small removable covers: the battery cover over the four AA cells, and a thin cover over the external connector (the EXT port), which is the link port.

The famous grey, and why it is so tough
The Game Boy's designer, Gunpei Yokoi, followed a principle he called lateral thinking with seasoned technology: instead of chasing the newest, most fragile components, use mature, cheap and rugged ones in clever ways. The case is that philosophy made solid. The plastic is thick, the corners are rounded, and the screen sits behind a recessed lip so a face-down drop lands on the frame rather than the glass.
The most famous proof of that toughness is a single console displayed for years at Nintendo's New York store: a DMG-01 that was caught in a fire during the 1991 Gulf War, its casing melted and blistered, which still powers on and plays Tetris. It is an extreme example, but it captures the everyday reality that Game Boys built in 1989 routinely still work today, something that cannot be said of most electronics of the era.
The D-pad: one small cross that shaped every controller since
The directional pad on the left is deceptively important. Nintendo had introduced the single-piece cross, or plus, control on its Game & Watch handhelds, and the Game Boy inherited it. Rather than four separate buttons or a fragile stick, it is one moulded cross that rocks on a central pivot. Press an arm and that side tips down.
Underneath sits the real mechanism: a soft conductive rubber pad. Each direction has a little dome of silicone with a disc of carbon-impregnated rubber on its underside. Pressing the pad collapses the dome, which gives the familiar tactile click, and pushes the carbon disc down onto two interleaved metal traces printed on the board, bridging them and telling the console that a direction is held. There are no microswitches to wear out, which is why a clean, original D-pad still feels crisp decades on. The same cross layout is now on essentially every game controller made.

A, B, Start and Select
On the right are the two main action buttons, A and B, round and, on the grey DMG-01, a deep magenta. Below the centre sit the smaller Start and Select keys, moulded in grey and set at a slight diagonal. Every one of them works on the same principle as the D-pad: a silicone rubber dome with a conductive carbon pad that bridges two traces when pressed.
On the board itself, small diodes sit in the button wiring. The buttons are read as a grid, or matrix, to save on connections, and the diodes stop presses from one row bleeding into another so the console always knows exactly which combination is held. It is a tiny, invisible detail, but it is the reason you can mash several buttons at once without the Game Boy getting confused.
Screen lens, speaker grille and the little wheels
A clear plastic lens is fixed into the front shell over the liquid-crystal display, protecting the delicate panel and giving the screen its slightly recessed, framed look. To its lower right, a grid of moulded slots forms the speaker grille, letting the single internal speaker breathe.
Around the edges are the manual controls that a modern device would bury in software. A thumbwheel on the right adjusts the volume; a matching wheel on the left adjusts the screen contrast, which on a reflective LCD is essential for getting a readable picture in different light. On the top edge, a sliding switch turns the console on and off, and, cleverly, the same slider physically locks the cartridge in place so it cannot be pulled out while the power is on.
The heat spreader and the inner frame
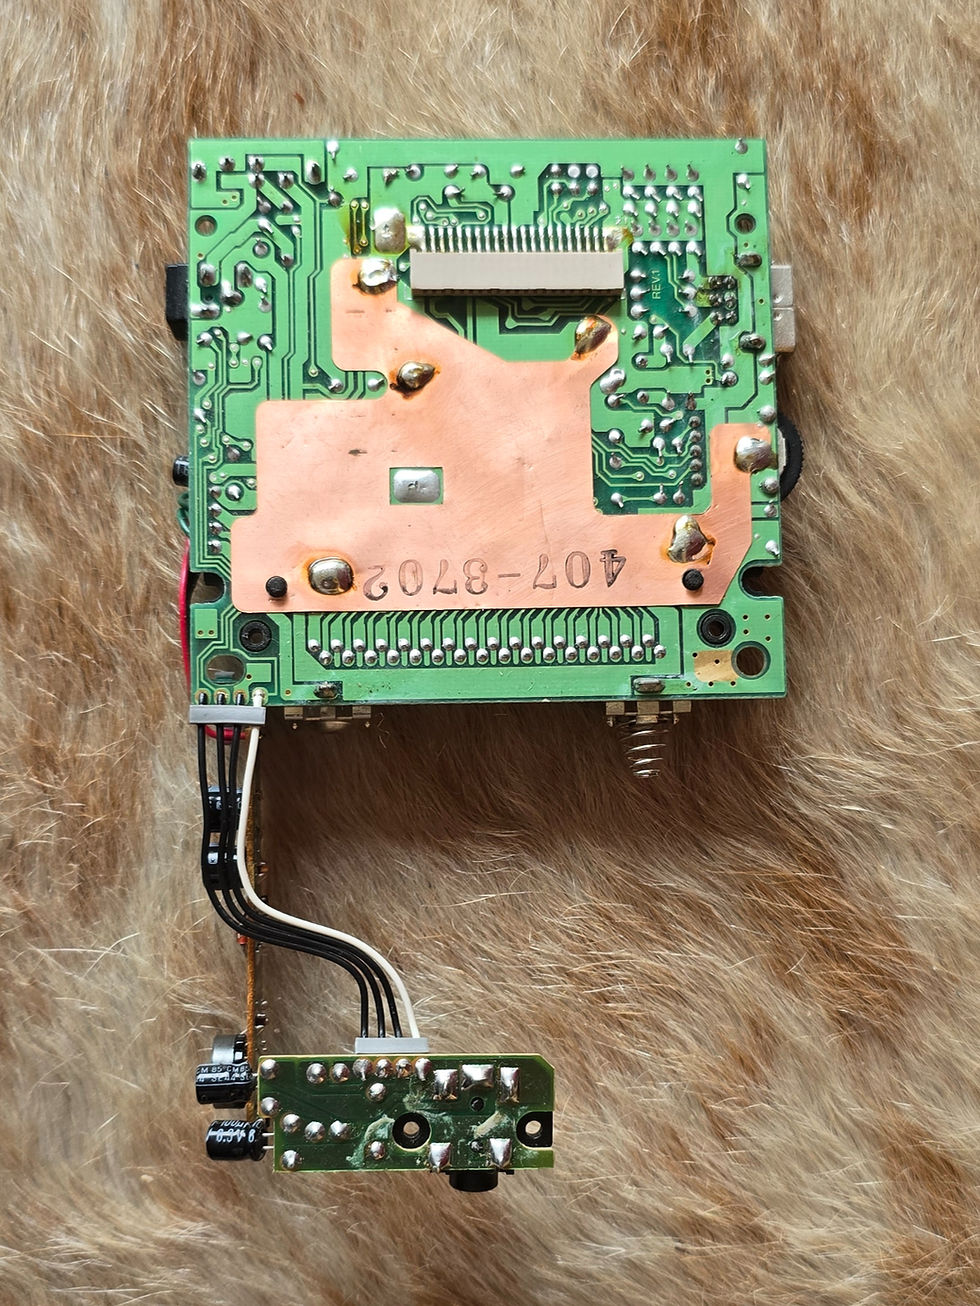
Open the console and you find more than plastic and boards. A copper plate sits on the backside of the main chips on the logic board. Because the Game Boy's processor and memory are bare silicon capped with a blob of black epoxy rather than packaged in ceramic, this plate works as a heat spreader, drawing warmth away from them and evening it out across a larger surface.
There is one further metal plate inside, at the cartridge slot, where it acts as a guide for the Game Pak as it slides into place. The boards themselves are held at the right height not by any plate but by the shell's moulded screw posts and support ribs together with the internal screws, which keep the whole stack rigid so nothing flexes or rattles when the console is knocked. Whether the copper plate also adds meaningful electrical screening is debated among restorers; what is clear and documented is its job as a heat spreader.
Why the outside matters
It is tempting to treat the case as just packaging for the clever electronics inside, but the shell and controls are a huge part of why the Game Boy succeeded and why it endured. The rugged plastic survived childhoods and journeys that would have killed a sleeker rival. The sturdy, serviceable build kept the machine repairable. And the cross pad and rubber-dome buttons gave a feel so right that the industry simply copied it. Everything from here inward, the boards, the chips, the screen and the sound, is what the next parts of this series take apart.
Specifications at a glance
Property | Specification |
|---|---|
Case | Moulded plastic, two halves |
Dimensions (W x H x D) | 90 x 148 x 32 mm |
Weight | ~300 g with batteries |
Case screws | 6 (4 outer + 2 in the battery bay), Nintendo tri-wing |
Internal screws | Phillips cross-head |
Directional control | One-piece cross D-pad |
Action buttons | A and B (magenta on the DMG-01) |
Other buttons | Start and Select |
Button mechanism | Carbon pads on silicone rubber domes |
Side dials | Contrast (left), Volume (right) |
Power switch | Top edge; locks the cartridge when on |
Removable covers | Battery cover and link-port (EXT) cover |
The Series
Overview · Part 1: The Shell, Buttons and Controls (you are here) · Part 2: The Main Board and the Sharp Processor · Part 3: The Screen · Part 4: Sound · Part 5: Power · Part 6: Connectivity and the Link Port



Comments